

There something about millionaire’s shortbread that makes people slow down for a second bite. A buttery base, a soft caramel middle, and a snap of chocolate on top it’s simple, but it never feels ordinary. This Mary Berry Caramel Shortbread recipe walks you through each layer so nothing turns out too soft, too hard, or too sweet.
Whether you’re baking for a family tea, a bake sale, or just craving something rich, this recipe is easy enough for beginners and satisfying enough for seasoned bakers. Follow the steps below for clean, bakery-style squares every time.
Recipe Overview
| Detail | Information |
| Recipe Name | Mary Berry Caramel Shortbread |
| Also Known As | Millionaire’s Shortbread |
| Servings | 12 squares |
| Prep Time | 20 minutes |
| Cook Time | 35 minutes |
| Chill Time | 1–2 hours |
| Total Time | 55 minutes (plus chilling) |
| Course | Dessert / Traybake |
| Cuisine | British |
| Calories | 320 kcal per serving |
Equipment You’ll Need
- Mixing bowls
- 20cm (8-inch) square baking tin
- Saucepan
- Spatula
- Measuring cups and spoons
- Sharp knife
- Parchment paper
Ingredients
For the Shortbread Base
- All-purpose flour – 1½ cups
- Butter – ½ cup, softened
- Sugar – ¼ cup
For the Caramel Layer
- Butter – ½ cup
- Brown sugar – ½ cup
- Condensed milk – 1 can (about 400g)
For the Chocolate Topping
- Chocolate (milk or dark) – 200g
How to Make Mary Berry Caramel Shortbread
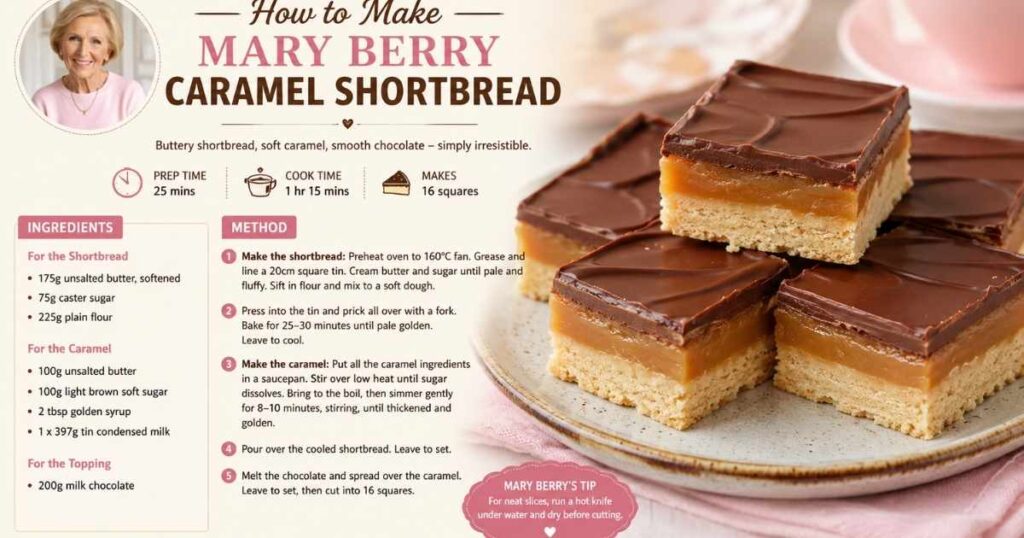
Step 1: Preheat the Oven
Set your oven to 180°C (160°C fan). Line your square tin with parchment paper, leaving a slight overhang so the finished bake lifts out cleanly.
Step 2: Make the Shortbread Base
Combine the flour, butter, and sugar in a mixing bowl. Work it together with your fingertips or a spoon until it forms a soft, even dough, then press it firmly into the base of the tin.
Step 3: Bake the Base
Bake for 15–20 minutes, until the shortbread is pale golden at the edges. Remove from the oven and let it cool slightly while you make the caramel.
Step 4: Prepare the Caramel
Add the butter, brown sugar, and condensed milk to a saucepan. Cook gently over medium heat, stirring constantly so it doesn’t catch on the bottom. The mixture will thicken and turn a deep golden colour after several minutes.
Step 5: Pour the Caramel
Pour the hot caramel evenly over the cooled shortbread base and smooth it out with a spatula. Leave it to cool and firm up slightly before adding the chocolate.
Step 6: Melt the Chocolate
Break the chocolate into small, even pieces and melt it in the microwave in short bursts, or over a double boiler, stirring until smooth and glossy.
Step 7: Add the Chocolate Layer
Pour the melted chocolate over the set caramel and spread it to the edges. Tap the tin gently on the counter to level the surface.
Step 8: Chill and Set
Transfer the tin to the fridge for 1–2 hours, until every layer is firm and the chocolate has set completely.
Step 9: Slice and Serve
Lift the traybake out using the parchment overhang and cut it into neat squares with a sharp knife. Serve and enjoy.
Related Post: Mala Dry Pot With Shrimp, Tofu and Pork Belly (Ganguo 干锅/Mala Xiangguo 麻辣香锅)
Expert Tips & Variations
- Use good-quality chocolate for a smoother, glossier finish
- Stir the caramel constantly so it doesn’t scorch on the base of the pan
- Chill thoroughly before slicing for cleaner, sharper layers
- Add a pinch of sea salt to the caramel for a salted caramel version
- Swap in dark chocolate if you prefer a less sweet finish
- Warm your knife under hot water before cutting for neater squares
History of Millionaire’s Shortbread
Caramel shortbread earned its nickname “millionaire shortbread” because of how rich and indulgent it tastes. The three-layer combination of shortbread, caramel, and chocolate became a staple of British home baking, prized for looking far more elaborate than it actually is to make. Today it’s a fixture at bake sales, afternoon teas, and dessert tables across the UK and well beyond.
Serving Suggestions
Caramel shortbread pairs naturally with a cup of tea or coffee, which helps balance out its sweetness. Fresh berries add a tart contrast to the rich layers, and a scoop of vanilla ice cream turns a simple square into a full dessert.
Occasion & Event Ideas
- Bake sales and school fetes
- Afternoon tea spreads
- Christmas and holiday gifting
- Family gatherings and celebrations
- Lunchbox treats
Because it slices neatly and travels well, it’s also a reliable option to box up as a homemade gift.
Storage and Reheating Tips
| Method | Guidance |
| Airtight container | Store at cool room temperature for 2–3 days |
| Refrigerator | Keeps well for up to 5 days |
| Freezer | Freeze in layers with parchment between pieces for longer storage |
| Serving | Bring to room temperature before serving for the best texture |
| Reheating | Avoid microwaving it will melt the caramel and chocolate layers |
Nutrition Information
| Nutrient | Amount per Serving |
| Calories | 320 kcal |
| Carbohydrates | 35 g |
| Protein | 3 g |
| Fat | 18 g |
| Fiber | 1 g |
Health Benefits
Caramel shortbread is a treat best enjoyed in moderation rather than an everyday snack. It provides quick energy from sugar and fat, and while it isn’t a health food, using good-quality butter and chocolate makes each square more satisfying, so a small portion goes a long way as part of a balanced diet.
Recipe Card
Mary Berry Caramel Shortbread a buttery shortbread base, smooth caramel centre, and glossy chocolate topping in one classic traybake.
Servings: 12 squares | Prep: 20 minutes | Cook: 35 minutes | Chill: 1–2 hours
Ingredients
For the Shortbread Base
- 1½ cups all-purpose flour
- ½ cup butter, softened
- ¼ cup sugar
For the Caramel Layer
- ½ cup butter
- ½ cup brown sugar
- 1 can (400g) condensed milk
For the Chocolate Topping
- 200g chocolate (milk or dark)
Instructions
- Preheat the Oven – Heat oven to 180°C and line a square tin with parchment paper.
- Make the Shortbread Base – Mix flour, butter, and sugar into a soft dough; press into the tin.
- Bake the Base – Bake 15–20 minutes until pale golden; cool slightly.
- Prepare the Caramel – Cook butter, brown sugar, and condensed milk over medium heat, stirring until thick and golden.
- Pour the Caramel – Spread the caramel evenly over the base and let it cool.
- Melt the Chocolate – Melt chocolate until smooth and glossy.
- Add the Chocolate Layer – Pour over the caramel and spread evenly.
- Chill and Set – Refrigerate for 1–2 hours until firm.
- Slice and Serve – Cut into squares and serve.
Notes
- For salted caramel, stir in a pinch of sea salt flakes before pouring the caramel layer.
- A warm, dry knife gives the cleanest cuts.
- This traybake actually improves after a day in the fridge, once every layer has fully set.
FAQ’s
Can I make this recipe ahead of time?
Yes, it stores well in the fridge for up to 5 days, so it’s ideal for baking a day or two before you need it.
Why is my caramel too soft or runny?
It likely needed longer on the heat the caramel should visibly thicken to a deep golden colour before you pour it.
Can I use only dark chocolate for the topping?
Yes, dark chocolate works well and gives a less sweet, more balanced finish than milk chocolate.
Do I need to chill it before slicing?
Chilling is essential for clean layers and neat squares, especially in a warm kitchen.
Can I freeze caramel shortbread?
Yes, freeze it in layers separated by parchment paper and thaw at room temperature before serving.
Final Thoughts
Mary Berry caramel shortbread earns its place as a British baking classic because it never overcomplicates things. Three simple layers, a handful of pantry ingredients, and a little patience while everything sets are all it takes to get a bake that looks like it came from a proper bakery counter. It’s forgiving enough for a nervous first attempt and reliable enough to become a repeat request from family and friends.
Once you’ve made it a couple of times, you’ll likely find your own small tweaks a touch more salt in the caramel, a swap to dark chocolate, or a slightly thicker base. That’s really the appeal of this recipe: it’s sturdy enough to experiment with, yet simple enough that it rarely goes wrong. Keep a batch in the fridge and you’ll always have something worth putting the kettle on for.